Camera and View Coverage Review
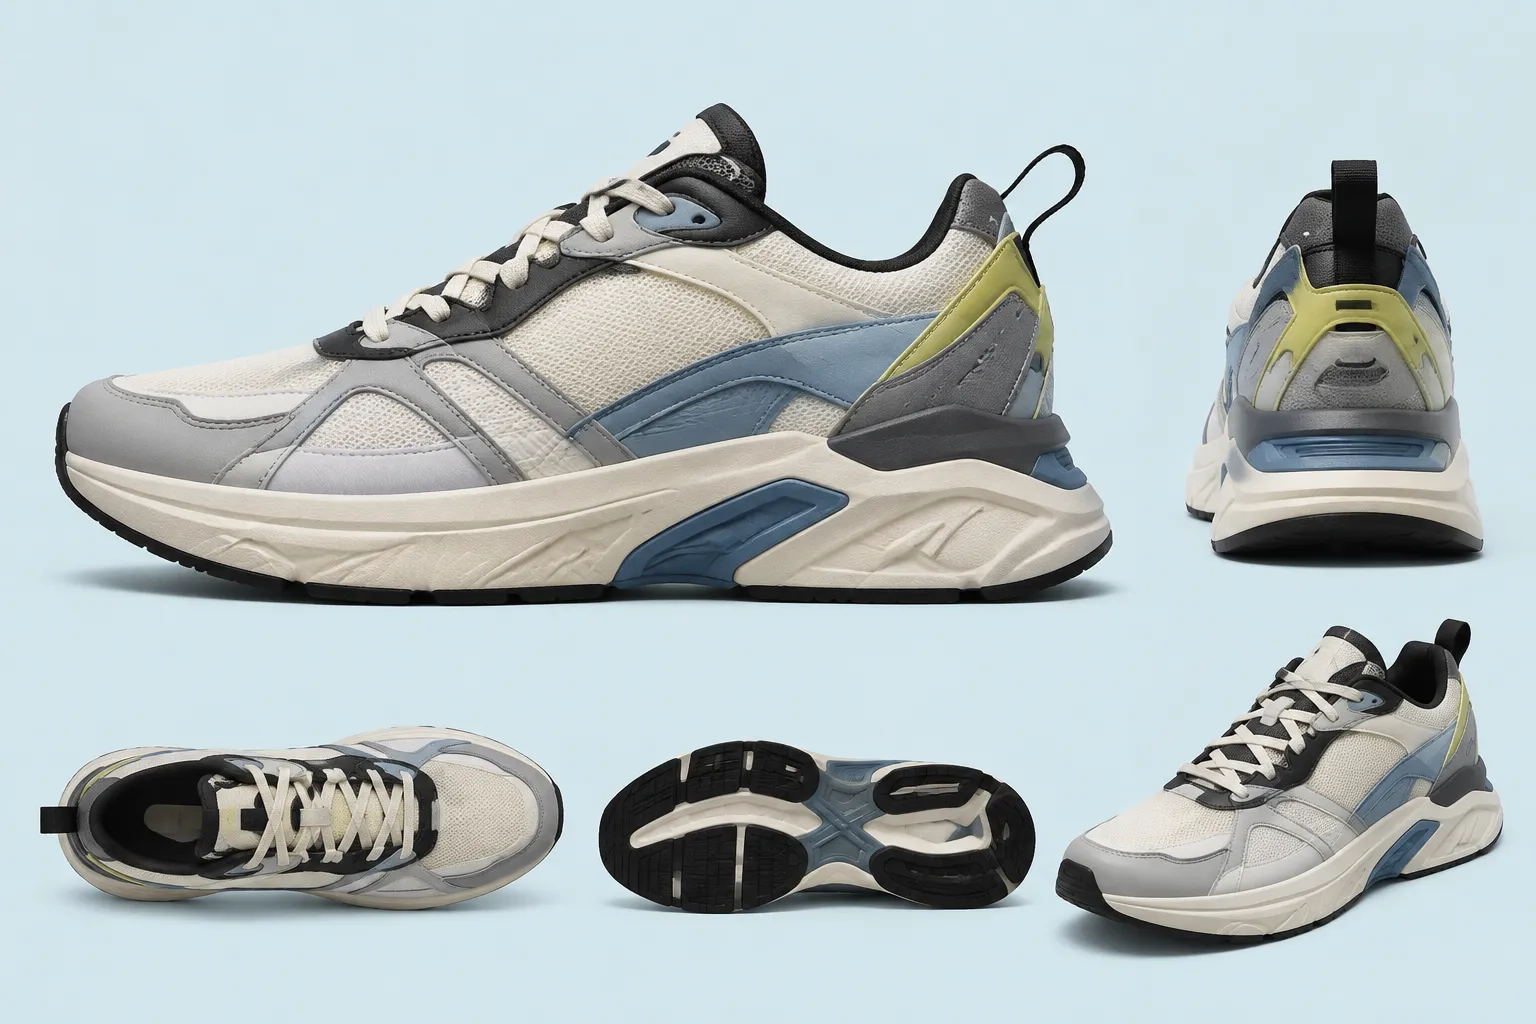
Choosing footwear render angles is a coverage decision, not a request for the largest possible image set. Each view should expose a specific concept decision that reviewers need to inspect, compare, or approve.
Start with the unresolved question. Side view silhouette proportions need a controlled lateral profile. Upper zoning that wraps around the heel needs rear or three-quarter coverage. Outsole color blocking or geometry needs a bottom view because the side edge leaves too much hidden.
More images can reduce uncertainty. They do not automatically improve the review.
- Which design decision must be visible?
- Which view exposes it with the least distortion or occlusion?
- Which adjacent view confirms continuity?
- Which construction, testing, or source-rights questions remain outside the image review?
The right angle set follows the decision burden of the deliverable and the review stage.
More specific pages
These pages continue the topic in smaller, more specific directions.
What View Coverage Makes Visible
A concept render can present silhouette, upper zoning, panel boundaries, apparent texture, surface response, color relationships, outsole treatment, and graphic continuity across views. It cannot make hidden information available simply by looking more polished.
A clean lateral render may obscure the medial side, throat opening, outsole center, heel construction, or the way panels turn around curved surfaces. A three-quarter footwear view adds depth, but overlapping forms and perspective can make exact proportions harder to compare.
View-dependent occlusion is a narrow visual limitation rather than a defect in the concept. Research on multi-view footwear imagery supports the more modest conclusion that an unseen region remains unresolved, even when the visible region appears convincing.
Use every view as evidence for a defined visual decision. Keep physical properties, construction outcomes, and usage rights on their own review tracks.
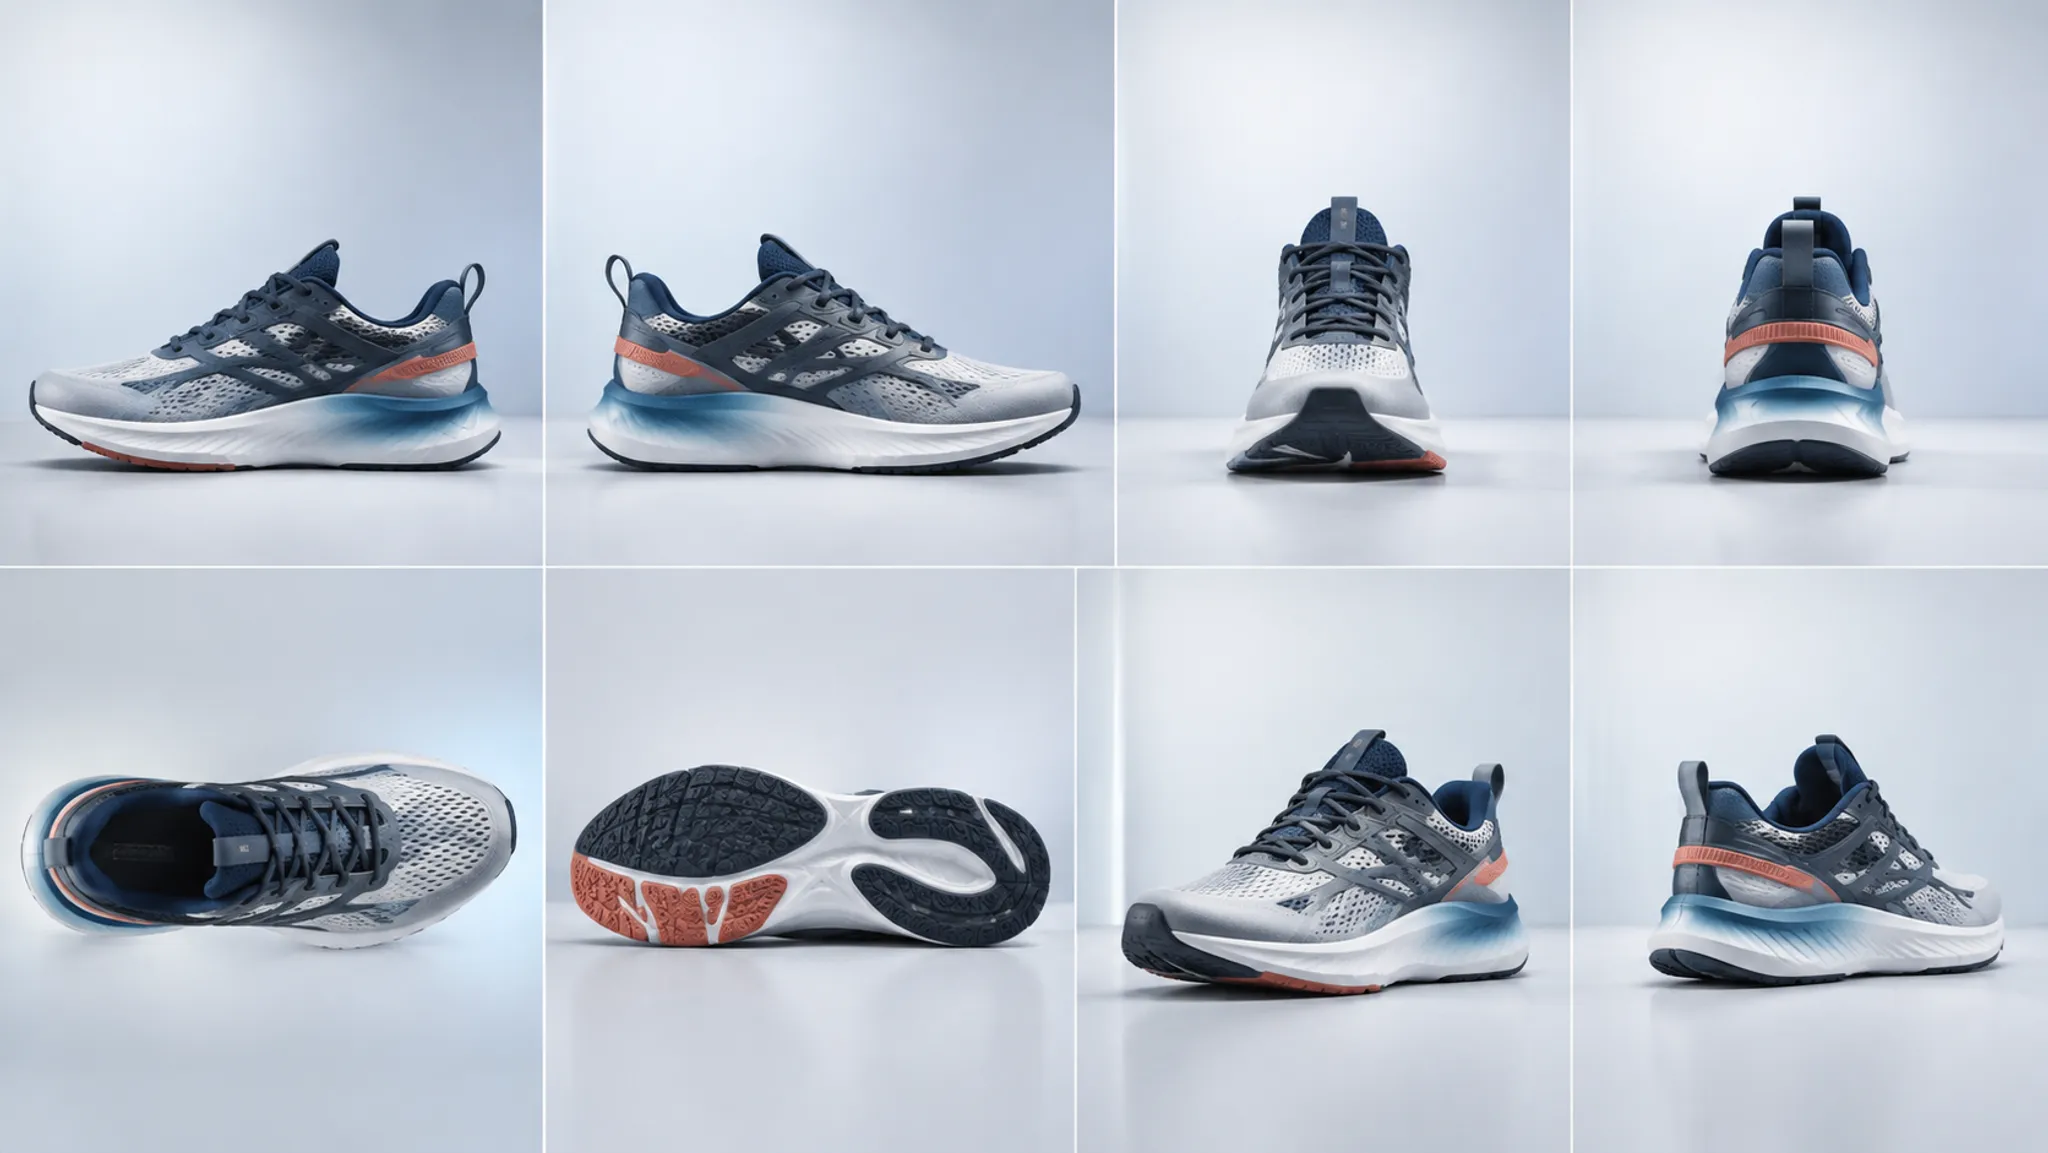
Footwear Render View Coverage Matrix
This Footwear Render View Coverage Matrix is a proposed review tool, not an industry standard. Adapt it to the variables under discussion.
| View | What it makes visible | What it commonly obscures | Decisions it can support |
|---|---|---|---|
| Lateral side | Overall profile, toe-to-heel proportion, lateral upper zoning, midsole line, logo scale | Medial construction, outsole center, much of the opening and heel wrap | Silhouette direction, lateral panel hierarchy, side graphic placement |
| Medial side | Medial zoning, inner eyestay, medial branding, asymmetrical treatment | Lateral identity features, full heel treatment, outsole center | Medial continuity, inner-side color, panel decisions |
| Front | Toe width appearance, toe-cap shape, lace centering, forefoot symmetry | Longitudinal proportion, sidewall graphics, heel structure | Toe character, central alignment, forefoot color balance |
| Rear | Heel width appearance, collar shape, rear graphics, seam and panel centering | Forefoot shape, most side zoning, outsole length | Heel identity, rear balance, wraparound panel continuity |
| Top | Throat, tongue, lace path, opening shape, toe-box zoning | Midsole height, side profile, much of the heel and outsole | Lace and tongue relationships, top color blocking, opening treatment |
| Outsole | Tread concept, segmentation, bottom color blocking, exposed windows | Upper zoning, side silhouette, collar and tongue | Outsole graphic logic, segmentation intent, bottom-view branding |
| Front three-quarter | Toe volume appearance, forefoot depth, lace relationship, sidewall transition | Exact side proportions, far-side panels, parts of the heel | Overall form impression, transition between front and side zones |
| Rear three-quarter | Heel volume appearance, collar transition, rear-to-side panel wrap | Toe details, exact side profile, far-side geometry | Heel wrap, collar direction, rear branding and side continuity |
| Turntable sequence | Changing relationships around the form, broad continuity, transient highlights | Fine comparison when frames, speed, or lighting vary | Continuity review and identification of missing still views |
No row is complete by itself. The matrix becomes useful when each view is tied to a question and each unresolved region is recorded.
Compare Angles By Decision
Side Views Carry the Silhouette Read
The lateral side is usually the clearest place to compare the long profile. It makes toe spring appearance, forefoot length, heel height, collar position, midsole rhythm, and major lateral zones easier to inspect.
It also carries many identity decisions: panel hierarchy, logo placement, eyestay direction, midfoot graphics, and the relationship between upper blocks and the sole. The medial profile still matters when the two sides differ or when a panel terminates behind the shoe.
Pair lateral and medial views when asymmetry matters. Keep camera height, ground line, scale, crop, and spacing comparable so the intended design difference remains easier to isolate.
Three-Quarter Views Show Transitions
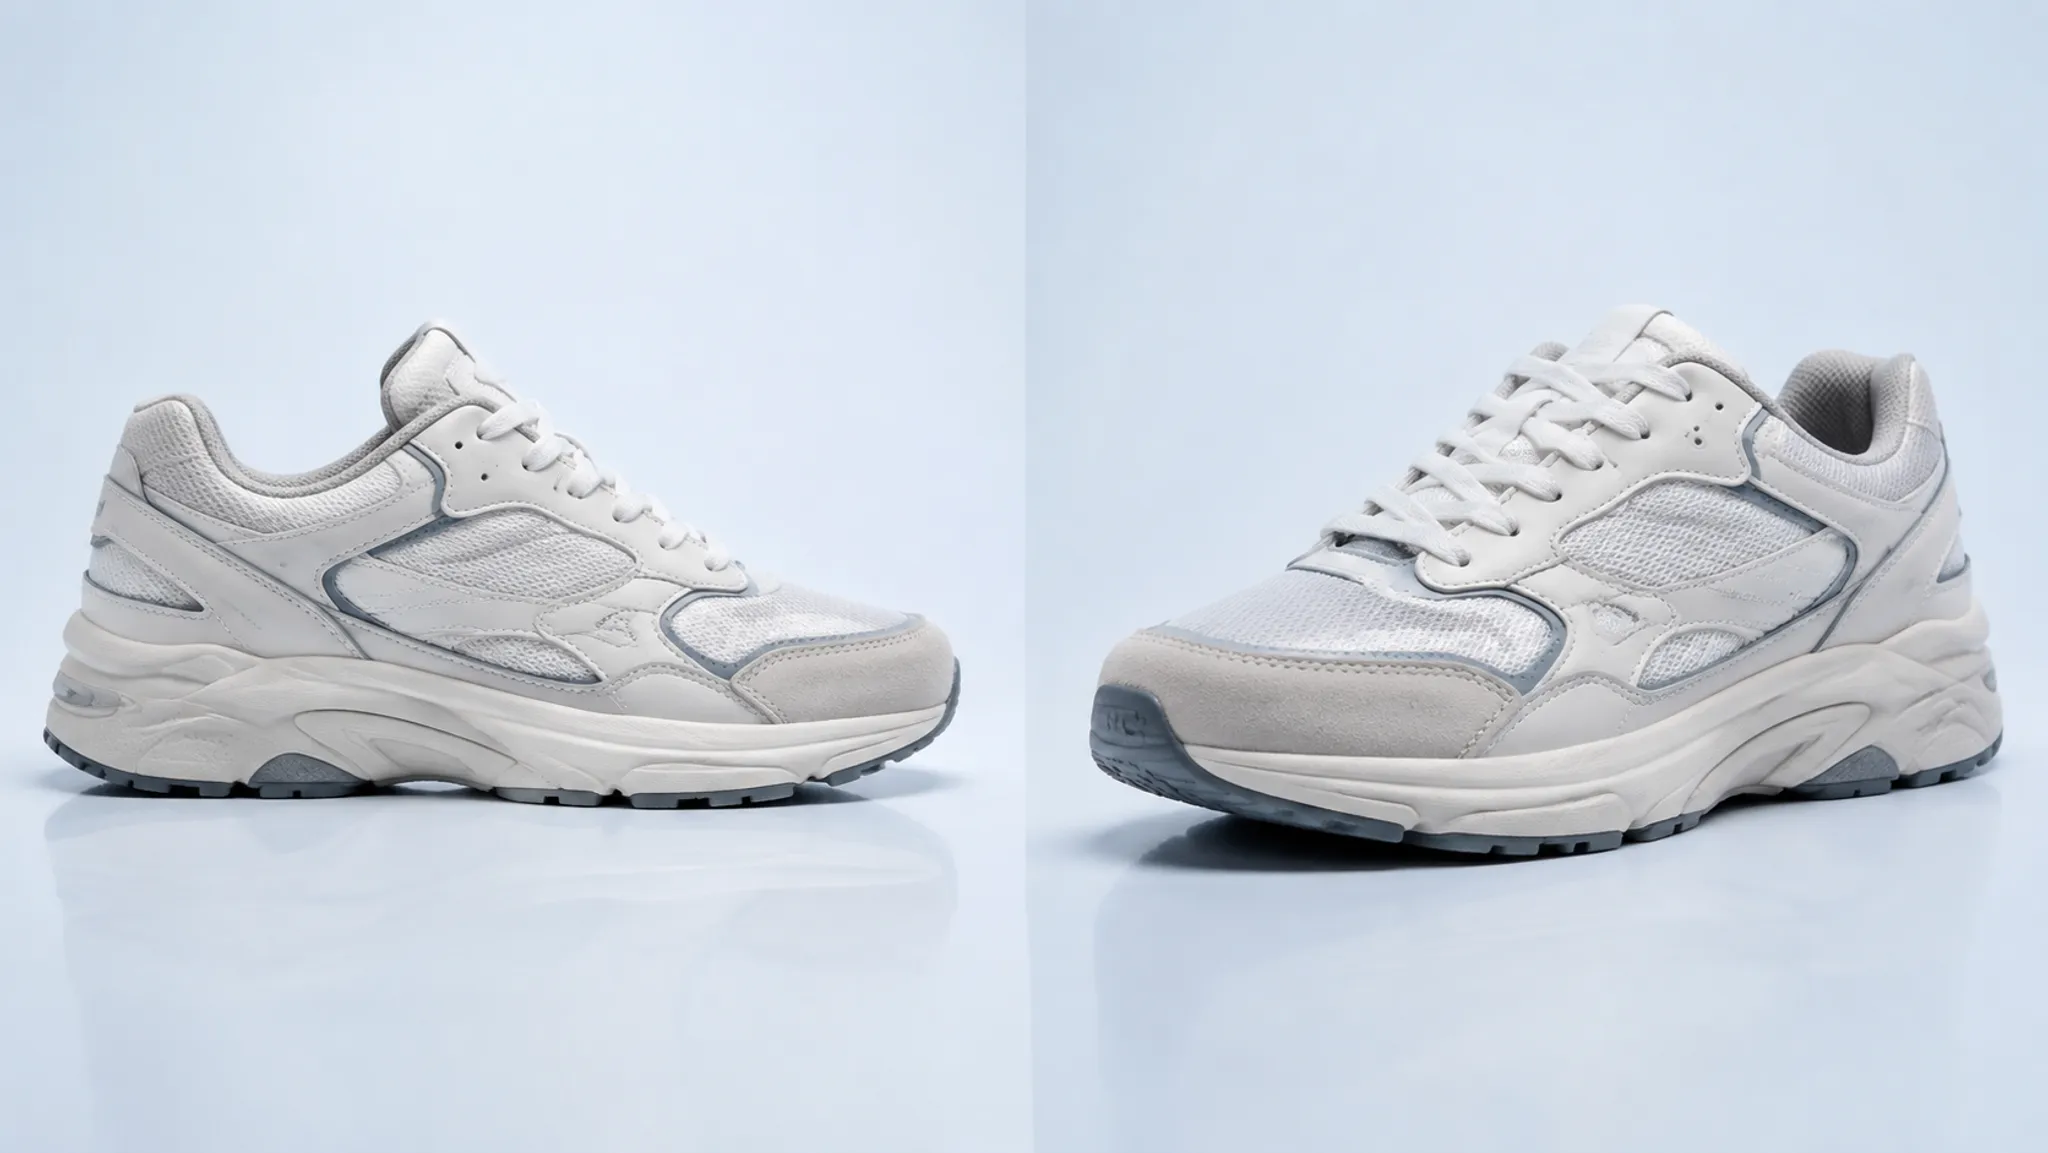
A three-quarter view gives the form depth. It can show how toe zoning moves into the eyestay, how the sidewall meets the forefoot, and how heel panels turn toward the opposite side.
The tradeoff is overlap. Near-side panels can hide far-side features, while perspective can make the toe or heel appear more dominant than it does in a controlled side view.
- Does the side graphic turn around the forefoot coherently?
- Does the heel treatment connect to the lateral and medial zones?
- Do layered panels remain visually separated as the surface turns?
- Does the material study retain its hierarchy away from the side profile?
- Does a campaign mockup preserve the recognizable concept form?
Use this angle for spatial character and transition review, not as the sole basis for precise side-profile comparison.
Rear Coverage Tests the Heel Handoff
Heel decisions often disappear in side-only reviews. The rear view makes the centerline, collar opening, heel width appearance, vertical panel structure, rear branding, and color transitions available for inspection.
Check alignment around the heel center, left-to-right collar balance, continuation of lateral and medial panels, branding scale, apparent separation between upper and sole, and the visibility of tabs, loops, or openings.
A rear render can suggest how these elements are intended to meet. It cannot confirm how the construction will hold its shape or behave in use.
Top and Outsole Views Need A Named Purpose
The top view separates decisions that collapse in side views: lace path, tongue proportion, throat opening, toe-box zoning, and left-to-right color balance. It is especially useful for central graphics, unusual eyestay geometry, layered tongue treatments, and color moving across the forefoot.
Do not infer fit or internal volume from the image. Apparent width depends on the modeled form and camera treatment, while physical fit remains a separate question.
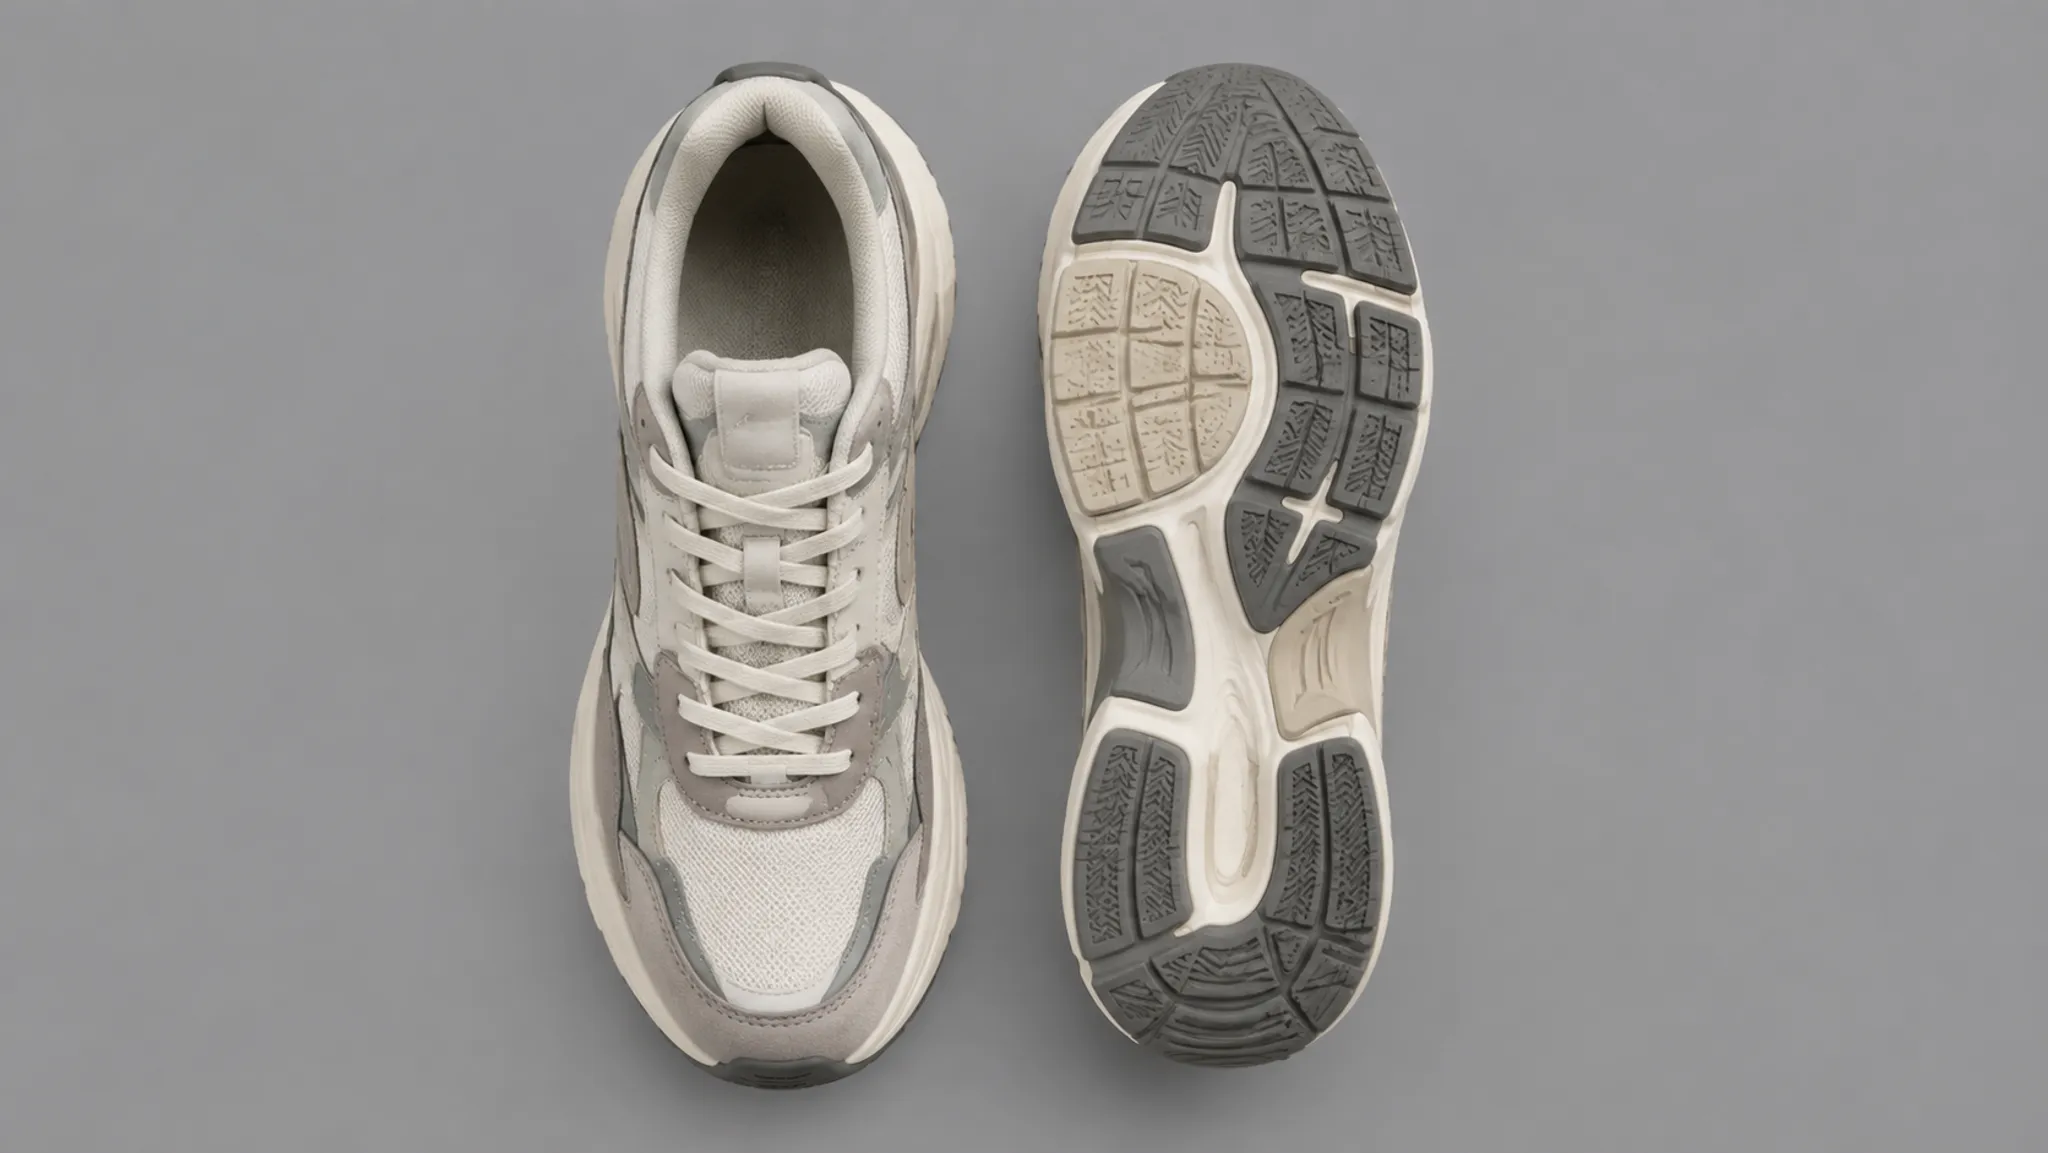
An outsole render earns its place when the bottom surface carries a decision, such as segmented color, a graphic, a logo, an exposed component, or sidewall geometry continuing beneath the shoe. Keep the judgment visual: a rendered tread form does not establish traction, wear behavior, tooling feasibility, or suitability for an activity.
Follow Panel Continuity Across Views
Footwear uppers are visually organized through boundaries, overlaps, stitching cues, textures, and surface transitions. Footwear CAD research offers useful terminology for discussing these details, but the render still shows appearance and intended relationship rather than the underlying assembly method.
- Locate the panel boundary in the lateral or medial view.
- Follow it into a front or rear three-quarter view.
- Confirm where it terminates in the front, rear, top, or opposite-side view.
- Compare its apparent thickness, overlap, and color treatment.
- Record any section that disappears before its endpoint becomes visible.
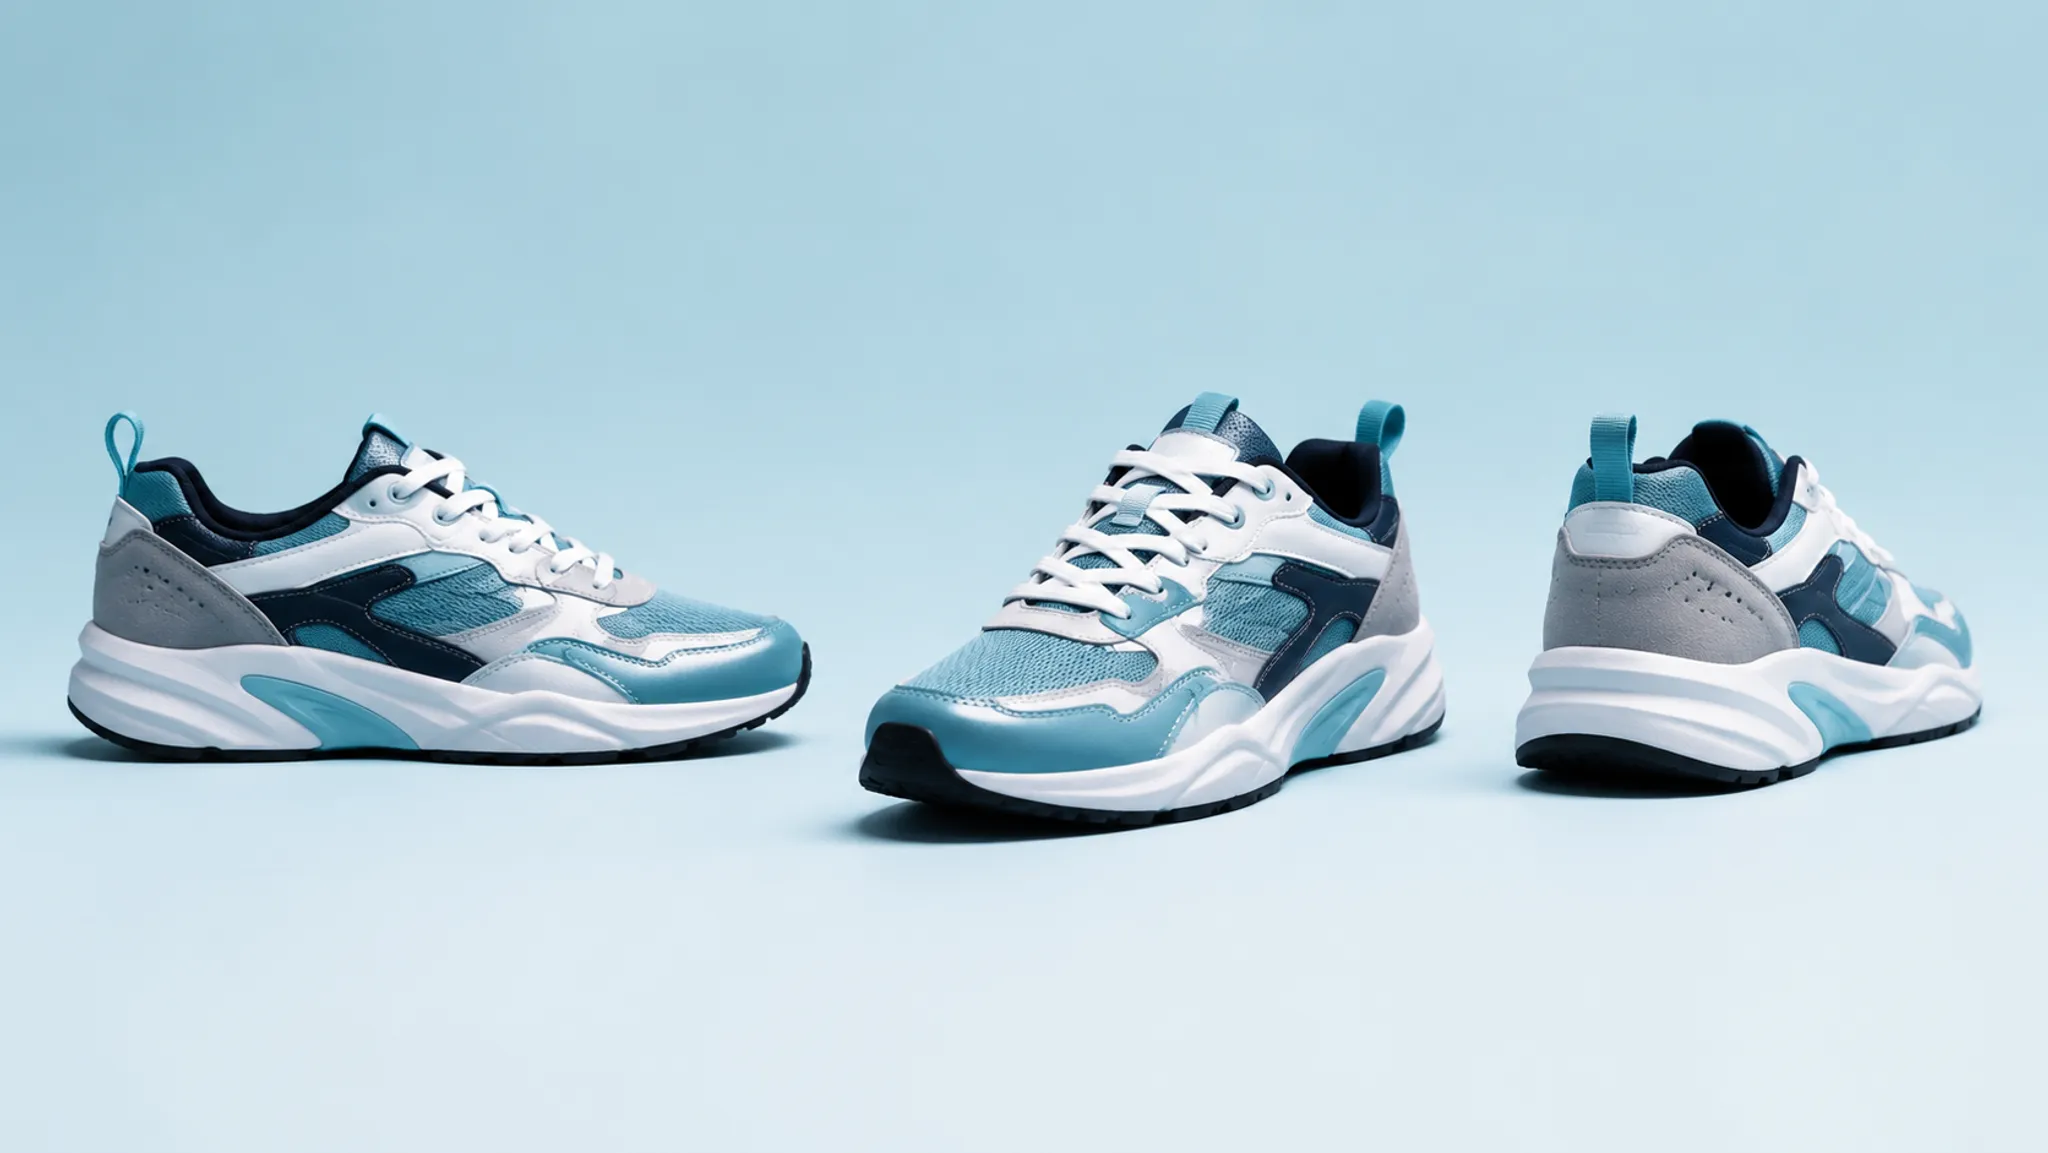
Paired render comparison views are stronger than isolated images here. One angle introduces the boundary; the adjacent angle shows whether it carries around the form as intended.
The same check applies to stripes, gradients, textures, and reflective-looking zones. A graphic may appear aligned in one frame yet shift or break as the camera moves.
Separate Material Cues From Material Facts
Material cues in renders depend on visible surface response. Highlights, roughness, texture scale, edge definition, and lighting direction can suggest differences between smooth, woven, coated, translucent-looking, or raised surfaces.
Review that suggestion as a material direction, not as proof of a specified material or its physical behavior.
- Zoning: Can reviewers identify where one intended surface ends and another begins?
- Response: Do highlights and shadows separate the intended surface cues?
- Consistency: Does the same zone retain a comparable appearance across the angle set?
A side view may clarify broad material zoning, while a three-quarter view reveals highlight movement across curved panels. A top view may expose texture scale on the toe or tongue, and a rear view may show whether adjacent surfaces remain distinguishable around the heel.
Keep environment, exposure, background, and lighting logic comparable. Otherwise, a surface may appear darker, glossier, or more saturated because the scene changed rather than the concept.
Check Color Relationships Between Views
Color review concerns area, placement, adjacency, and visual weight, not only whether a swatch exists. Different views expose different proportions of each zone.
A heel accent may dominate the rear view while remaining minor from the side. A top graphic may change the balance around the throat without changing the lateral identity.
One color-methodology study compared predefined viewpoints under its own experimental conditions and selected a right-side view for a particular colorway analysis. It is a bounded example, not a universal angle rule, and its publication timing should be verified before formal citation.
Use the view that exposes the color decision, then add the adjacent angle needed to check continuation. Record the relative area of each zone, boundaries between colors, lateral-to-rear or top-to-medial wrap, highlight and background effects, variant alignment, and regions hidden in every supplied view.
A single attractive angle can support a color direction. It cannot establish the full color relationship around the shoe.
Keep Variant Comparisons Consistent
Camera changes can masquerade as design changes. A variant may look longer because it fills more of the frame, or its heel may appear heavier because the camera moved closer to that end.
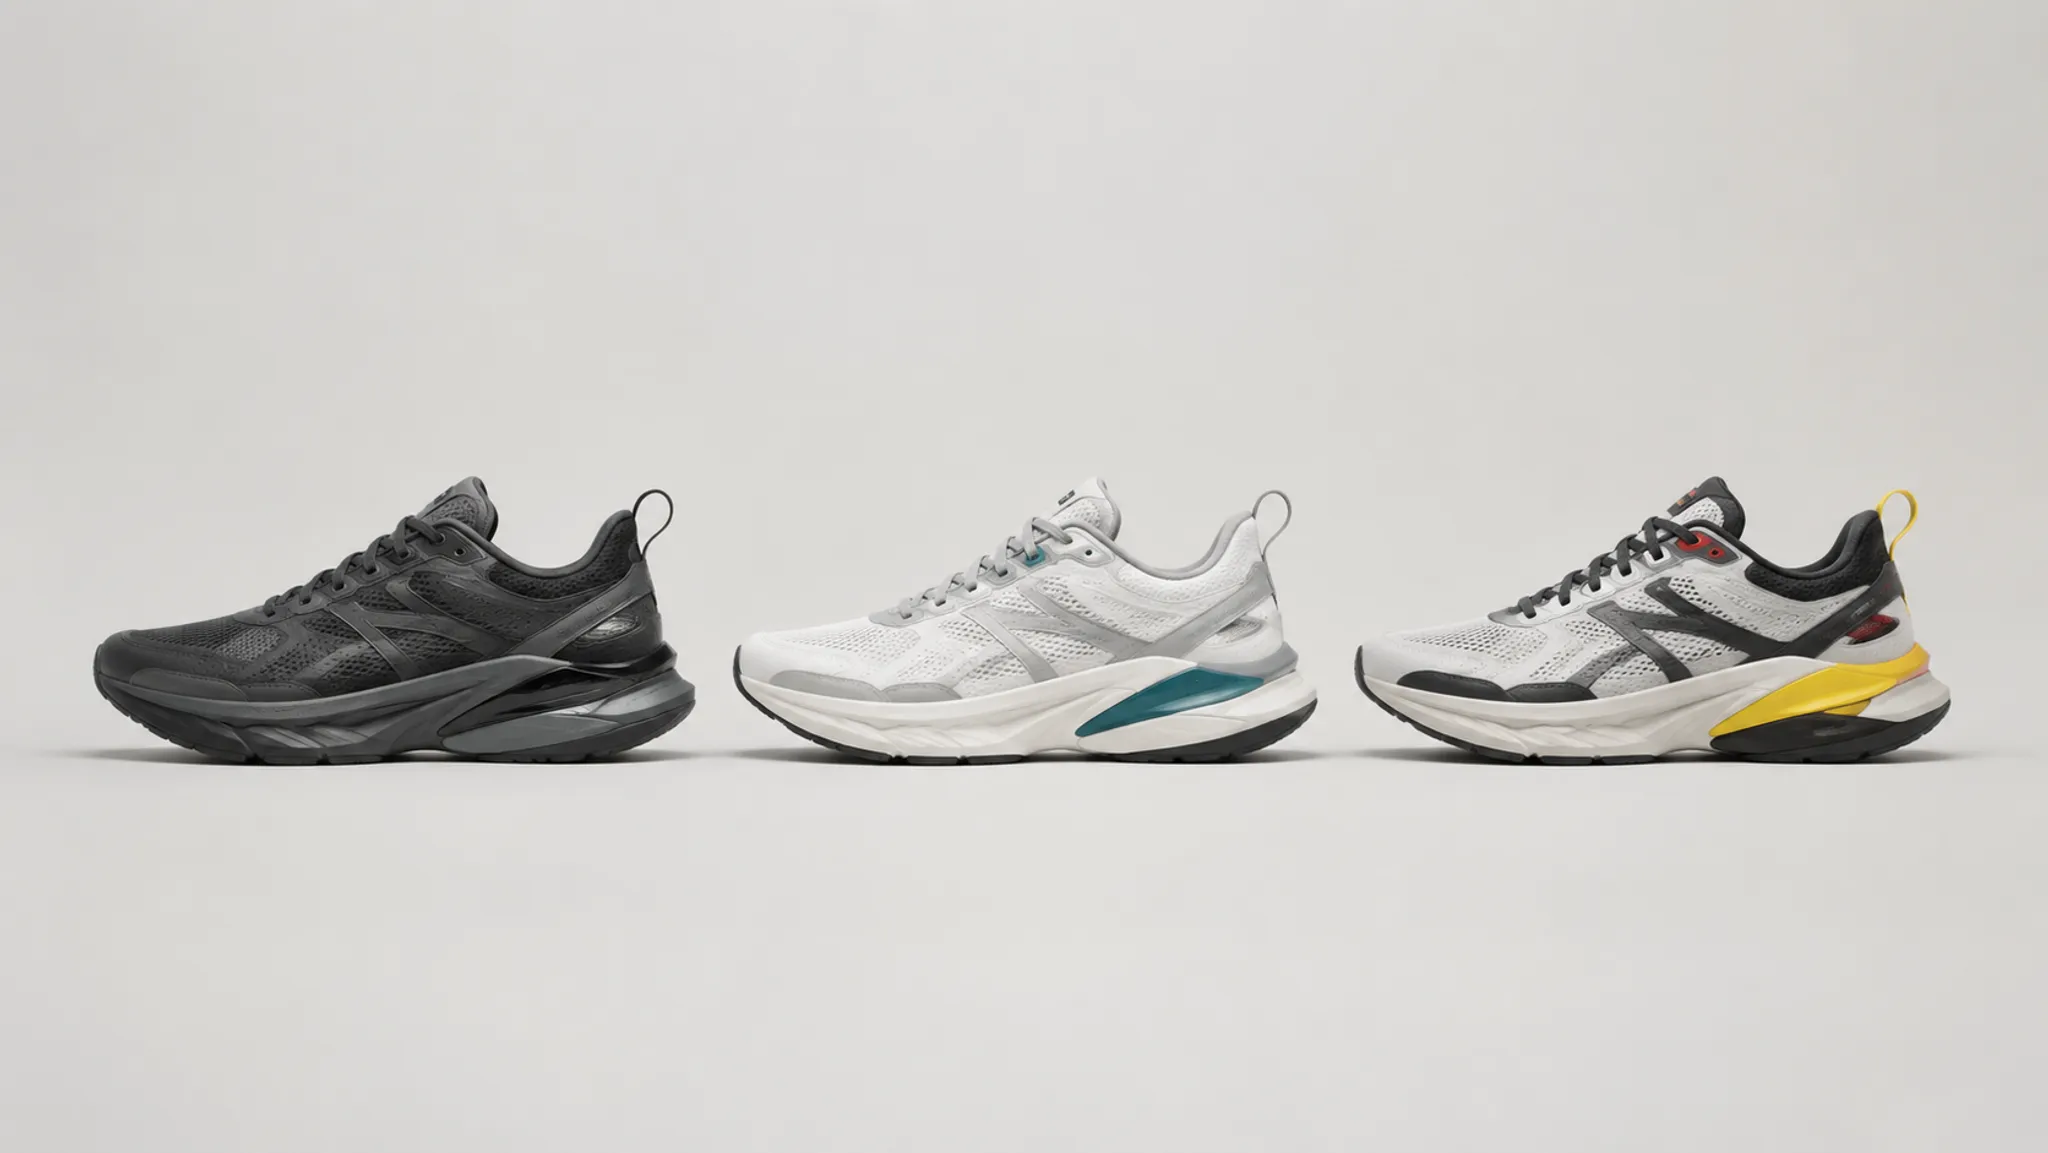
For paired variants, keep camera position, object orientation, image scale, ground line, crop, lighting direction, background value, view order, naming, and annotation method comparable. This removes avoidable visual variables without implying that the underlying concept is physically resolved.
When framing must change, label the change. A close material study and a full silhouette view serve different purposes and should not be presented as matched comparisons.
Diagnose Occlusion Before Adding Views
Footwear render occlusion occurs when one form blocks another from the selected viewpoint: laces cover the tongue, overlays cover base panels, the near side hides the far side, and the upper blocks much of the outsole.
Occlusion becomes a review problem when the hidden region contains an unresolved decision.
- Name the decision reviewers cannot make.
- Mark the region containing the missing information.
- Identify what blocks or compresses that region.
- Choose the smallest angle change that exposes it.
- Decide whether a still, detail crop, or turntable frame communicates it most clearly.
Do not add a diagonal view merely to increase the image count. Add it because it resolves a named gap.
An on-foot mockup introduces further occlusion from the leg, pose, and clothing. It may support campaign composition, but it should not replace isolated product views needed for upper review.
Match Coverage To The Deliverable
Silhouette Review
Prioritize lateral and medial profiles with controlled framing. Add front or rear views when width appearance, heel treatment, or toe character changes the decision.
Upper Zoning Review
Use lateral and medial views, then add top and three-quarter coverage for panel wrap, throat geometry, and overlapping zones. Rear coverage matters when panels continue around the heel.
Material Study
Choose angles that expose surface curvature and highlight response without hiding zone boundaries. Keep lighting stable enough to distinguish material cues from scene changes.
Colorway Comparison
Use matched views across every variant. Include the angles where secondary colors, heel accents, tongue treatments, and outsole blocks become visible.
Campaign Mockup
A three-quarter or on-foot composition may carry the communication goal. Retain isolated comparison views when design approval is also expected from the same package.
Non-Final Turntable
Use the moving sequence to inspect broad continuity. Request still views for decisions requiring close comparison of proportions, boundaries, or variants.
Common Misunderstandings
- Presentation quality is mistaken for coverage. Polished lighting can make an image persuasive while important regions remain hidden.
- View count is mistaken for information. Five similar three-quarter views may reveal less than one side, rear, and top view chosen around specific decisions.
- Turntable motion is mistaken for inspection clarity. Movement shows changing relationships, but stable frames are easier for boundary and variant comparison.
- Camera consistency is mistaken for design consistency. Matched framing isolates differences; it does not prove resolved geometry or construction.
- Visible material appearance is mistaken for material specification. Texture and surface response remain visual cues without supporting documentation.
- Complete imagery is mistaken for documented usage permission. An angle set does not establish ownership, license scope, or permission to reuse a reference.
Keep these categories separate so visual approval carries only the meaning the images can support.
Record Decisions And Open Questions
A useful review record is short enough to maintain and specific enough to support the next handoff.
| Field | Review entry |
|---|---|
| View name | Lateral, medial, top, rear, outsole, or specified three-quarter |
| Review purpose | The decision this view is meant to support |
| Visible evidence | The zones, boundaries, or relationships the render makes visible |
| Occluded evidence | Important regions that remain hidden |
| Comparison controls | Framing, scale, crop, lighting, and variant order |
| Decision status | Accepted, revise, compare again, or unresolved |
| Next handoff | Design, engineering, sampling, physical evaluation, campaign production, or rights review |
| Source record | Origin, creator or provider, permission status, license record, and usage limits |
Treat source records as a separate evidence track. A filename, visual label, or apparent attribution does not substitute for permission or license documentation.
Compact View Coverage Check
- Every view supports a named review decision.
- Lateral and medial asymmetry is visible where relevant.
- Side silhouette proportions can be compared without framing changes.
- Front and rear treatments are not inferred from three-quarter views alone.
- Top zoning, tongue, lace, and opening decisions are visible when they matter.
- Outsole treatment appears when it carries color, graphics, or segmentation.
- Panel boundaries can be followed across adjacent views.
- Material cues remain distinguishable under comparable presentation conditions.
- Color relationships can be traced around the form.
- Variant views use consistent framing and order.
- Occluded regions are named rather than silently assumed.
- Turntable frames are supplemented where still comparison is required.
- Concept approval is separated from later physical evaluation.
- Source and usage records are documented independently from visual approval.
Stop adding views once the required visual decisions are reviewable. Record what remains hidden or dependent on later work.
From Visual Review To Handoff
The render set may establish that a silhouette direction is visually preferred, a color relationship is coherent, a panel appears to wrap as intended, or a variant remains recognizable across matched views. It may also identify conflicts requiring another concept pass.
Questions about construction, fit, comfort, physical performance, durability, manufacturing, tested material behavior, and usage rights belong to downstream evidence and documentation. They should not be carried forward as settled conclusions from the image set.
A practical handoff contains three lists:
- Decided: visible concept choices accepted for the current review stage
- Revise: visible conflicts requiring another render or design pass
- Unresolved: physical, technical, testing, or usage-rights questions outside the image set
Approve the image set for its stated visual job, revise named gaps, and move unresolved physical or rights questions to the appropriate downstream review.
Sources
- ShoeFit: A New Dataset and Dual-image-stream DiT for a narrow reference point on incomplete or viewpoint-dependent footwear imagery.
- A Methodology for Matching Colors in Product Design Using Gradient Colors and a New Aesthetic Measurement Method for a study-specific example of viewpoint and colorway evaluation.
- Panel rendering with perturbed boundary profiles in aesthetic shoe CAD for terminology related to upper-panel boundaries and surface-detail representation.